Mastering Fundamental Techniques for Beginner Landscape Photography
Capturing the grandeur of the natural world through a lens is a pursuit that blends technical skill with artistic vision. For those just embarking on this rewarding journey, understanding the fundamental techniques for beginner landscape photography is not merely an advantage—it's a prerequisite for creating truly impactful images. This comprehensive guide will navigate you through the core principles, essential gear, and creative strategies needed to elevate your outdoor photography, ensuring that every click of the shutter brings you closer to mastering this captivating art form. Whether you're drawn to sweeping vistas or intricate natural details, the insights here will lay a solid foundation for your photographic endeavors.
- What Exactly Is Landscape Photography?
- Mastering the Essentials: Fundamental Techniques for Beginner Landscape Photography
- Essential Gear for the Aspiring Landscape Photographer
- Advanced Techniques and Creative Approaches
- Post-Processing: Bringing Your Vision to Life
- Real-World Scenarios and Ethical Considerations
- The Future of Landscape Photography
- Frequently Asked Questions
- Further Reading & Resources
- Conclusion
What Exactly Is Landscape Photography?
At its core, landscape photography is the art of capturing natural and man-made scenery to convey a sense of place, atmosphere, or visual narrative. It's a broad genre, encompassing everything from vast mountain ranges and tranquil seascapes to bustling cityscapes and intimate forest scenes. Unlike portraiture, where the subject is typically a person, landscape photography positions the environment itself as the star, inviting the viewer to immerse themselves in the scene. The goal is often to evoke emotion, highlight beauty, or document the ever-changing face of our planet.
Historically, landscape art has been a significant form of expression, with photography taking over from painting in the 19th century as a powerful medium for documentation and artistic interpretation. Early pioneers like Ansel Adams elevated landscape photography to an art form, emphasizing technical precision and a deep understanding of light and composition. Today, with advancements in digital technology, it's more accessible than ever, yet the foundational principles remain timeless. The challenge and allure lie in translating a three-dimensional, dynamic scene into a compelling two-dimensional image, requiring careful consideration of light, perspective, and arrangement of elements within the frame.
Mastering the Essentials: Fundamental Techniques for Beginner Landscape Photography
Before delving into specific gear or advanced settings, grasping the foundational concepts of exposure, focus, and composition is paramount. These are the pillars upon which all great landscape photographs are built. Without a solid understanding of these elements, even the most expensive camera will fail to deliver its full potential.
Understanding the Exposure Triangle: ISO, Aperture, and Shutter Speed
The exposure triangle is arguably the most critical concept in photography, dictating how much light reaches your camera's sensor. Manipulating these three interdependent settings allows you to control the brightness, depth of field, and motion blur in your images.
- Aperture (f-stop): This refers to the opening in your lens that controls the amount of light entering the camera. It is measured in f-numbers (e.g., f/2.8, f/8, f/16).
- A smaller f-number (e.g., f/2.8) means a wider aperture, allowing more light in and creating a shallower depth of field (more background blur).
- A larger f-number (e.g., f/16) means a narrower aperture, allowing less light in and creating a deeper depth of field (more of the scene in focus, front to back), which is often desirable in landscape photography. For sharp landscapes, f/8 to f/16 is a common range.
- Shutter Speed: This is the duration for which the camera's shutter remains open, allowing light to hit the sensor. It is measured in fractions of a second (e.g., 1/250s, 1/30s) or full seconds (e.g., 2s, 30s).
- A fast shutter speed (e.g., 1/500s) freezes motion, useful for windy scenes or capturing birds in flight.
- A slow shutter speed (e.g., 1/2s or longer) creates motion blur, perfect for smoothing water, blurring clouds, or capturing star trails. A tripod is essential for slow shutter speeds to prevent camera shake.
- ISO: This represents the camera sensor's sensitivity to light.
- A low ISO setting (e.g., ISO 100) means less sensitivity, producing cleaner images with less digital noise but requiring more light or longer exposure times. This is generally preferred for landscape photography to maximize image quality.
- A high ISO setting (e.g., ISO 1600) means greater sensitivity, allowing for shooting in low light conditions or with faster shutter speeds, but at the cost of increased digital noise (graininess).
The interplay between these three settings is crucial. If you increase one, you often need to decrease another to maintain a correct exposure. For example, to achieve a deep depth of field with a narrow aperture (f/16), you'll likely need to compensate with a slower shutter speed or a slightly higher ISO, depending on the available light.
Achieving Pin-Sharp Focus: The Art of Depth of Field
In landscape photography, achieving sharpness throughout the scene, from a foreground rock to a distant mountain, is often paramount. This is where a deep depth of field comes into play, typically achieved with a narrower aperture (higher f-number).
- Hyperfocal Distance: A key concept for maximizing sharpness. It's the closest distance at which a lens can be focused while keeping objects at infinity acceptably sharp. By focusing at the hyperfocal distance, you ensure that everything from approximately half that distance to infinity is in focus. Many apps and charts can help calculate this for your specific lens and aperture.
- Manual Focus: While autofocus is convenient, for landscapes, especially in low light or with complex foregrounds, manual focus offers greater precision. Zoom in on a point about one-third of the way into your scene and manually adjust focus for optimal sharpness.
- Focus Peaking and Magnification: Modern mirrorless cameras and some DSLRs offer in-camera aids like focus peaking (highlights in-focus edges) and magnification (digitally zooming into the live view) to assist with precise manual focusing.
Composing for Impact: Rules and Guidelines
Composition is where the science of photography meets art. It's about arranging elements within your frame to create a visually appealing and impactful image. While "rules" are meant to be broken, understanding them provides a strong foundation.
- The Rule of Thirds: Imagine your frame divided into nine equal sections by two horizontal and two vertical lines. Placing key compositional elements along these lines or at their intersections often creates a more balanced and dynamic image than simply centering them. Studies suggest that viewers' eyes are naturally drawn to these intersection points.
- Leading Lines: These are natural or man-made lines (e.g., rivers, roads, fences, shorelines) that draw the viewer's eye from the foreground deep into the scene, creating a sense of depth and direction.
- Framing: Using natural elements like tree branches, archways, or rock formations to "frame" your main subject adds depth, context, and a sense of looking into the scene.
- Foreground Interest: A common pitfall for beginners is focusing solely on the grand vista. Including an interesting element in the foreground (a unique rock, a patch of flowers, a fallen log) provides an anchor for the viewer's eye and adds crucial depth to the image.
- Symmetry and Patterns: Nature often presents opportunities for symmetry (e.g., reflections in water) or repeating patterns (e.g., rows of dunes, ripples on sand). These can create powerful, harmonious compositions.
- Negative Space: The empty space around and between the subject(s) of an image. It can be used to draw attention to the main subject, create a sense of scale, or evoke a mood (e.g., a small tree against a vast, empty sky).
- Horizon Placement: Avoid placing the horizon exactly in the middle of your frame. For landscapes dominated by an interesting sky, place the horizon on the lower third line. If the land is more compelling, place it on the upper third.
The Power of Light: Understanding its Quality and Direction
Light is the photographer's paintbrush. Its quality, direction, and color temperature dramatically influence the mood and impact of a landscape photograph.
- Golden Hour: The period shortly after sunrise or before sunset, when the sun is low on the horizon. It produces soft, warm, diffused light that enhances textures and casts long, pleasing shadows. This is arguably the most coveted time for landscape photographers.
- Blue Hour: The period of twilight when the sun is below the horizon but before sunrise or after sunset. It baths the scene in a cool, ethereal blue light, often used for cityscapes or moody natural landscapes.
- Overcast Days: While direct sunlight can be harsh, an overcast sky acts like a giant softbox, providing soft, even, diffused light. This is excellent for forest scenes, waterfalls, and close-up nature shots where harsh shadows would be distracting. The conditions of the atmosphere, influenced by factors like atmospheric pressure, play a critical role in the quality of light.
- Backlighting: Positioning your subject between your camera and the light source (e.g., the rising or setting sun). This can create dramatic silhouettes, rim lighting, or lens flares, adding a distinct visual flair.
- Side Lighting: Light coming from the side enhances texture and depth by creating strong shadows and highlights. This is excellent for emphasizing rugged mountains or weathered structures.
- Color Temperature: Light has a "color," measured in Kelvin. Sunrise/sunset light is warm (orange/red), while midday light is cooler (blue/white). Understanding this allows you to set your camera's white balance correctly to reproduce colors accurately or artistically.
Essential Gear for the Aspiring Landscape Photographer
While stunning photos can be taken with minimal equipment, certain tools significantly enhance capability and image quality. This section outlines the essential gear for those serious about landscape photography.
Camera Bodies: DSLR vs. Mirrorless
Both Digital Single-Lens Reflex (DSLR) and Mirrorless cameras are excellent choices, each with its advantages.
- DSLRs: Traditionally known for their robust build, longer battery life, and optical viewfinders. Brands like Canon and Nikon dominate this space. They offer a vast array of lenses and accessories.
- Mirrorless Cameras: Gaining significant market share, mirrorless cameras are generally more compact, lighter, and often feature advanced autofocus systems and electronic viewfinders (EVFs) that show real-time exposure changes. Sony, Fujifilm, Canon, and Nikon all offer strong mirrorless lines. The choice between the two often comes down to personal preference, budget, and existing lens investments. Full-frame sensors are generally preferred for landscape photography due to their superior low-light performance and dynamic range, though APS-C sensors can also produce excellent results.
Lenses: Your Window to the World
The lens is arguably more important than the camera body in defining image quality and perspective.
- Wide-Angle Lenses (14-35mm): These are the workhorses of landscape photography. They capture a broad field of view, ideal for sweeping vistas, dramatic skies, and emphasizing foreground elements. Lenses in the 16-35mm or 14-24mm range are very popular.
- Standard Zoom Lenses (24-70mm): Versatile for a variety of scenes, offering a natural perspective. Good for capturing "intimate landscapes" or scenes where you don't need an ultra-wide view.
- Telephoto Lenses (70-200mm, 100-400mm): While not typically associated with wide vistas, telephoto lenses are invaluable for compressing perspective, isolating distant subjects (like mountain peaks), or capturing detailed elements within a larger landscape. They can also create compelling abstract landscapes.
- Prime Lenses: Fixed focal length lenses (e.g., 20mm, 50mm). Often sharper and with wider apertures than zooms, but less versatile. Useful for specific artistic effects or astrophotography.
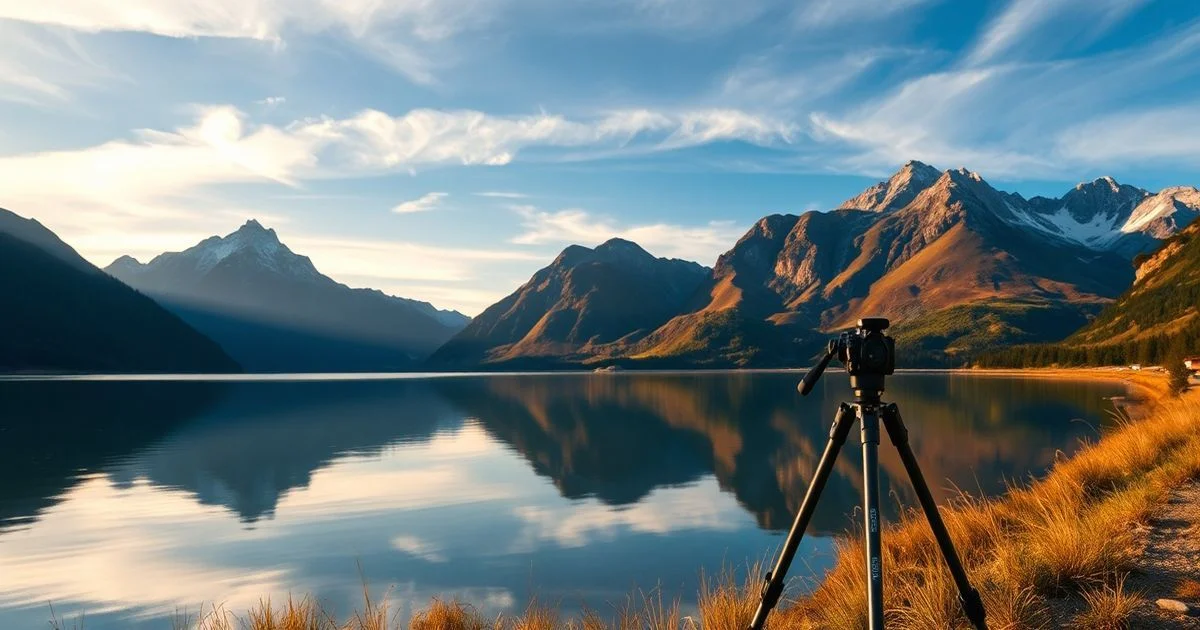
The Indispensable Tripod
A sturdy tripod is non-negotiable for serious landscape photography. It provides stability, allowing for:
- Sharp Images: Eliminates camera shake, especially with slower shutter speeds or in low light.
- Long Exposures: Essential for blurring water, clouds, or shooting at night.
- Precise Composition: Allows you to meticulously compose your shot without worrying about holding the camera steady.
- Bracketing and Panoramas: Ensures consistent framing for advanced techniques.
Look for a tripod that is stable, lightweight enough for hiking, and has a reliable ball head or pan-tilt head. Carbon fiber tripods offer an excellent balance of strength and portability.
Filters: Enhancing Your Vision In-Camera
Filters are physical attachments to your lens that modify the light entering the camera.
- Polarizing Filter (CPL): Reduces glare and reflections from water, foliage, and other non-metallic surfaces. It also saturates colors and enhances blue skies, making clouds pop. An essential filter for any landscape photographer.
- Neutral Density (ND) Filters: These are like sunglasses for your camera, reducing the amount of light uniformly across the scene without affecting color. They allow you to use much slower shutter speeds in bright conditions, perfect for smooth water or streaky clouds. ND filters come in various strengths (e.g., 3-stop, 6-stop, 10-stop).
- Graduated Neutral Density (GND) Filters: These filters have a dark half and a clear half, with a gradual transition between them. They are used to balance exposure between a bright sky and a darker foreground, preventing overexposed skies or underexposed foregrounds. They come in soft-edge, hard-edge, and reverse-grad variations.
Other Essential Accessories
- Remote Shutter Release: Wired or wireless, this allows you to trigger the shutter without touching the camera, further minimizing camera shake during long exposures.
- Extra Batteries: Cold weather, long exposures, and frequent use deplete batteries quickly. Always carry spares.
- Memory Cards: Multiple high-capacity, fast memory cards are crucial.
- Lens Cleaning Kit: Dust, water spots, and smudges can ruin a perfect shot. A lens pen, microfiber cloth, and blower bulb are essential.
- Sturdy Camera Bag: Protects your gear and allows for comfortable transport, often with dedicated compartments for lenses, filters, and accessories.
- Weather Protection: Rain covers for your camera and lenses, and appropriate outdoor clothing for yourself.
Advanced Techniques and Creative Approaches
Once comfortable with the basics, these techniques can add significant impact and artistic flair to your landscape photography.
Long Exposure Photography
This technique, mentioned briefly earlier, deserves its own deep dive. By using ND filters and a tripod, you can extend shutter speeds from seconds to several minutes.
- Water: Transforms choppy waves into silky smooth surfaces or turns a flowing river into a dreamy mist.
- Clouds: Creates streaks and motion blur in the sky, adding dynamism and an ethereal quality.
- Night Skies: Captures star trails as the Earth rotates, or reveals faint nebulas and galaxies with extremely long exposures (often requiring specialized equatorial mounts). Understanding celestial mechanics, much like understanding the lifecycle of a star, deepens one's appreciation for such shots.
Mastering long exposure requires patience, careful calculation (often with ND filter apps), and understanding how light conditions affect exposure times.
Panoramas and Stitching
When a wide-angle lens isn't quite wide enough, or you want an ultra-high-resolution image, panoramas are the solution.
- Process: Take a series of overlapping photos (typically 30-50% overlap) by rotating your camera on a tripod. Ensure consistent exposure for all shots.
- Post-Processing: Specialized software (like Adobe Lightroom, Photoshop, or dedicated panorama stitchers) then digitally "stitches" these individual frames together into one seamless, wide image.
- Benefits: Captures an incredibly wide field of view, far exceeding what a single lens can offer, and produces massive image files with immense detail. This is particularly useful for grand mountain ranges or city skylines.
Exposure Bracketing and HDR
The dynamic range of a scene (the difference between the brightest highlights and darkest shadows) often exceeds what a single camera sensor can capture in one exposure.
- Bracketing: Taking multiple photos of the same scene at different exposures (e.g., one underexposed, one correctly exposed, one overexposed). Many cameras have an auto-bracketing feature.
- High Dynamic Range (HDR): In post-processing, these bracketed images are merged to create a single image with a much wider dynamic range, revealing detail in both the highlights and shadows that would otherwise be lost. While it can produce stunning results, overuse can lead to an artificial, "HDR look" – aim for a natural blend.
Focus Stacking for Extreme Sharpness
For scenes where you need extreme front-to-back sharpness, even with a narrow aperture, focus stacking can be employed.
- Process: Take several photos of the same scene, each focused at a different point (e.g., one on the foreground, one on the mid-ground, one on the background).
- Post-Processing: Merge these images in software (like Photoshop) to combine only the sharpest parts of each frame into one final image that is sharp throughout. This is particularly useful for scenes with a very close foreground element and a distant background, where hyperfocal distance alone might not suffice for absolute sharpness across the entire depth.
Post-Processing: Bringing Your Vision to Life
The camera captures raw data; post-processing is where you interpret that data and refine your image to match your artistic vision. It's an integral part of the modern photography workflow, not a way to "fix" bad photos, but to enhance good ones.
Essential Software and Basic Adjustments
Adobe Lightroom and Photoshop are industry standards, but alternatives like Affinity Photo, Capture One, and GIMP also offer powerful editing capabilities.
- Raw Files: Always shoot in RAW format. Unlike JPEGs, RAW files contain all the data from your sensor, giving you maximum flexibility for adjustments without degrading image quality.
- Basic Panel Adjustments (Lightroom/Similar):
- Exposure: Fine-tune overall brightness.
- Highlights & Shadows: Recover detail in blown-out highlights or crushed shadows. This is where a camera's dynamic range truly shines.
- Whites & Blacks: Set the true white and black points in your image, adding contrast and punch.
- Contrast: Adjust the difference between light and dark tones.
- Clarity: Enhances mid-tone contrast, making textures pop (use sparingly).
- Dehaze: Reduces or adds atmospheric haze, very useful for landscapes.
- Color Adjustments:
- White Balance: Correct color casts and set the mood (warmer or cooler).
- Vibrance & Saturation: Vibrance subtly enhances less saturated colors, while saturation boosts all colors uniformly.
- HSL (Hue, Saturation, Luminance) Panel: Allows precise control over individual color ranges, enabling you to fine-tune skies, foliage, or specific elements.
Sharpening, Noise Reduction, and Local Adjustments
- Sharpening: Applies contrast to edges to make the image appear crisper. Always apply sharpening at the end of your workflow and carefully to avoid introducing artifacts.
- Noise Reduction: Reduces the graininess (noise) that can appear in photos, especially those taken at higher ISOs or in low light. Modern software is excellent at this, balancing noise reduction with detail preservation.
- Local Adjustments: Tools like graduated filters, radial filters, and adjustment brushes (in Lightroom/Photoshop) allow you to apply specific adjustments (exposure, contrast, color) to only certain parts of your image. This is incredibly powerful for balancing light, darkening a bright sky, or brightening a foreground without affecting the entire image.
Cropping and Straightening
The final touches. Cropping can refine your composition, removing distractions and strengthening the focus on your main subject. Straightening the horizon is a fundamental correction that immediately improves the professionalism of a landscape shot. Slight rotations can often significantly improve balance.
Real-World Scenarios and Ethical Considerations
Beyond the camera settings and software, landscape photography involves planning, adaptation, and responsibility.
Planning and Scouting Locations
Great landscape photos are rarely accidental.
- Research: Use apps like PhotoPills, The Photographer's Ephemeris, or local maps to determine sun position, moon phase, Milky Way visibility, and tides for seascapes. Online resources, blogs, and social media can also provide location ideas and insights.
- Scouting: If possible, visit your chosen location at different times of day to understand the light, identify compelling compositions, and note any potential challenges.
- Weather: Monitor forecasts closely. While clear skies are nice, dramatic weather (storms, fog, unique cloud formations) can lead to truly unique and memorable images.
Adaptability in the Field
Nature is unpredictable. Be prepared to adapt your plans based on changing light, weather, or unexpected obstacles. The ability to react quickly and make on-the-fly compositional or exposure adjustments is a hallmark of an experienced landscape photographer. Sometimes, the most stunning shot comes from an unforeseen moment.
Environmental Stewardship and "Leave No Trace"
Landscape photographers have a unique connection to nature, and with that comes a responsibility.
- Leave No Trace Principles: Always practice ethical outdoor behavior. Pack out everything you pack in, stay on marked trails, respect wildlife, and minimize your impact on the environment. The goal is to leave the area exactly as you found it, if not better.
- Respect Private Property and Local Regulations: Be aware of property boundaries, permits required for certain locations, and any rules regarding drones or off-trail access. Obtaining permission or adhering to guidelines is crucial.
- Share Responsibly: When sharing locations online, consider the potential impact of increased traffic on sensitive ecosystems. Sometimes, being less specific about exact locations can help preserve them.
The Future of Landscape Photography
The landscape photography world is continuously evolving, driven by technological innovation and a growing environmental consciousness.
Technological Advancements
- Computational Photography: Cameras are increasingly leveraging AI and computational power to enhance dynamic range, reduce noise, and even correct lens imperfections in real-time. Features like in-camera focus stacking and advanced bracketing will become more sophisticated and user-friendly.
- Sensor Technology: Expect further improvements in sensor resolution, low-light performance, and dynamic range, pushing the boundaries of what's possible to capture.
- Drones: While controversial in some areas due to noise and privacy concerns, drones offer unparalleled aerial perspectives, opening up new compositional possibilities for landscapes. As regulations evolve, drone photography will continue to shape how we view and capture the Earth.
- Augmented Reality (AR) and Virtual Reality (VR): These technologies could offer new ways to scout locations virtually or even present immersive landscape experiences beyond traditional two-dimensional prints or screens. Imagine "walking" through a meticulously captured 360-degree landscape.
Environmental Imperative
As climate change and environmental degradation become more pressing, landscape photography will increasingly play a role in conservation. Photographers can use their platforms to:
- Document Change: Capture the beauty of disappearing glaciers, eroded coastlines, or resilient ecosystems, echoing urgent environmental discussions like the accelerating Antarctic ice melt.
- Raise Awareness: Through powerful imagery, inspire action and foster a deeper connection between viewers and the natural world.
- Advocate for Protection: Collaborate with environmental organizations and contribute to conservation efforts.
The future of landscape photography is not just about capturing beauty, but about preserving it and inspiring others to do the same.
Frequently Asked Questions
Q: What is the most important piece of gear for landscape photography?
A: While a good camera and lens are crucial, a sturdy tripod is arguably the most important accessory. It enables sharp images, long exposures, and precise composition, especially in low light or challenging conditions.
Q: What is the "golden hour" and why is it important?
A: Golden hour is the period shortly after sunrise or before sunset. The sun's low angle produces soft, warm, diffused light that enhances textures and colors, creating a more visually appealing and dramatic scene for landscape photographs.
Q: Should I shoot in JPEG or RAW format?
A: Always shoot in RAW format for landscape photography. RAW files capture all the data from your camera's sensor, offering maximum flexibility for post-processing adjustments like exposure, white balance, and color, without losing image quality.
Further Reading & Resources
- National Geographic: Photography Tips
- B&H Photo Video Explora: Introduction to Landscape Photography
- Adobe Creative Cloud: Landscape Photography Tips
- Wikipedia: Landscape Photography
Conclusion
Embarking on the journey of landscape photography is a rewarding endeavor that combines technical mastery with creative expression. By diligently applying the fundamental techniques for beginner landscape photography, you can transform ordinary scenes into extraordinary visual stories. From understanding the nuances of the exposure triangle and composing with intent to leveraging essential gear and refining your vision in post-processing, each step builds confidence and skill. Remember that practice is paramount; the more you shoot, the more you learn about your gear, your environment, and your unique artistic voice. Embrace the process, respect the natural world, and let your passion for capturing its beauty guide your lens. The world awaits your unique perspective.